Last updated: 01/01/2024
Table of Contents
- How-Tos
- General How-Tos
- Buyer How-Tos
- Chef How-Tos
- Registering a Chef Type Account
- Updating a Chef Profile
- Adding a Listing
- Updating/Editing a Listing
- Viewing Your Listing/s
- Managing Your Listing/s
- Viewing Your General Calendar
- Viewing a Listing’s Calendar
- Viewing Your Orders
- Viewing Transactions
- Viewing Your Dashboard
- Requesting Payout
- Inviting Buyers
- Inviting Chefs
- Frequently Asked Questions (FAQs)
- Contact Details
1. How-Tos
Easy-to-follow, detailed instructions with screenshots, pictures, photos and videos that show you how to accomplish each task.
General How-Tos
Logging into an Account
- Click, or tap, on a Login button on the Platform to launch the Login popup.
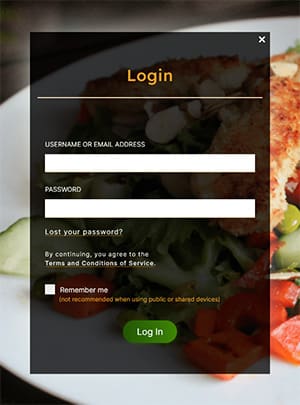
- Complete the USERNAME OR EMAIL ADDRESS and PASSWORD fields. Should you have forgotten your password, you can click, or tap, on the Lost your password link to launch the Password Reset popup or scroll to the How-To section titled Resetting a Password.
- Note that by continuing, you consent to all the Terms and Conditions of Service that you consented to during the account registration processes. We do however recommend reading through them regularly as they could change, and their new effective dates will always be noted on them. You can view all the Terms and Conditions of Service by clicking, or tapping, on the link provided in the Login popup, or at any time whilst using the Platform by clicking, or tapping, on the Legal Documents link in the footer menu.
- There is a Remember me checkbox that you can click, or tap, on should you prefer the Platform not to require a Login from you each time you visit. This is however not recommended when using public or shared devices as other users of these will then be able to access your account.
- Click, or tap, on the Log In button.
Resetting a Password
- Click, or tap, on the Lost your password link on the Login popup to launch the Reset Password popup.
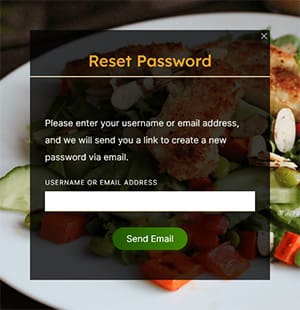
- Complete the USERNAME OR EMAIL ADDRESS field with your username or email address used when registering your account.
- Click, or tap, on the Send email button.
- Check the email address’s inbox attached to the account for an email from the Platform, which includes the Reset Password link you need to click, or tap on. Once you have found and clicked, or tapped, on the link, the Platform will open the Set New Password page.
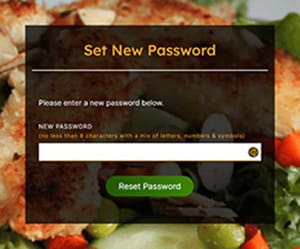
- Complete the NEW PASSWORD field with your new password (no less than 8 characters with a mix of letters, numbers, and symbols).
- Click, or tap, on the Reset Password button.
- Should the reset password process be successful, you will automatically be logged in to the platform and able to continue.
Searching for Listings
- Navigate to the Listings Search form that can be found on the Home or Listings pages.

- Complete the LOCATION field (you may click, or tap, on the orange arrow on the right of the input area to use the auto-locate function) and select the listing type CATEGORY from the drop-down list, should you wish to search for a listing type more specific than All Categories. The DATE and TAG fields are optional; however, the Date field is recommended. Tags could be used by chefs to further group listings, like vegan, vegetarian, keto, kosher, etc.
- Click, or tap, on the Search button, and the listings that match your search criteria will be displayed.
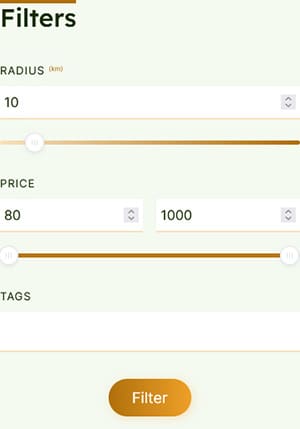
- Once the results are displayed, you can use the available filters to refine the results further to your liking.
Searching for Chefs
- Navigate to the Chefs Search form that can be found on the Chefs page.

- Complete the LOCATION field (you may click, or tap, on the orange arrow on the right of the input area to use the auto-locate function) and select the listing type CATEGORY from the drop-down list, should you wish to search for a chef type more specific than All Categories.
- Click, or tap, on the Search button, and the chefs that match your search criteria will be displayed.
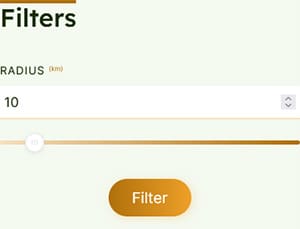
- Once the results are displayed, you can use the Filters available to refine the results further to your liking.
Adding a Shortcut to Your Mobile Device's Home Screen
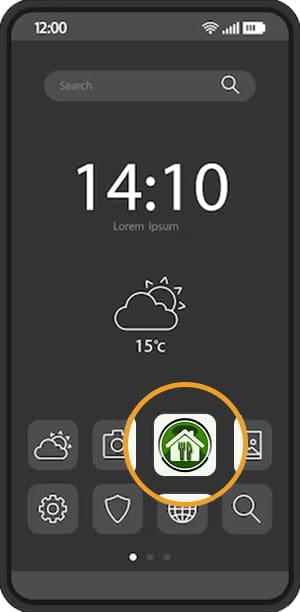
This process differs for various mobile devices and browsers, please make sure to scroll down and follow the instructions relevant to your device and the browser you may be using.
Android (Google Chrome & Mozilla Firefox)
- Open the browser (Chrome or Firefox) and navigate to the Munchies4U Platform (https://Munchies4U.co.za).
- Tap the Menu icon (three dots).
- Tap “Add to Home Screen”.
- Edit the icon title to your liking and tap “Add”. Firefox will use the Platforms site icon image as the icon image, but unfortunately Chrome doesn’t, so you’ll have just a “M” as the image on your home screen.
- You can move the icon around and put it in folders just like an app icon, but it just will not be appearing in the App library.
Android (Samsung Internet)
- Open Samsung Internet and navigate to the Munchies4U Platform (https://Munchies4U.co.za).
- Tap the Menu Icon (hamburger/three horizontal lines).
- Tap “Add page to” and then tap “Home screen”.
- Edit the icon title to your liking and tap “Add”. Samsung Internet unfortunately doesn’t use the Platforms site icon image as the icon image, so you’ll have just a “M” as the icon image on your home screen.
- You can move the icon around and put it in folders just like an app icon, but it just will not be appearing in the Apps library.
iOS & iPadOS (Safari)
- Open Safari and navigate to the Munchies4U Platform (https://Munchies4U.co.za).
- Tap the share icon (rounded square with the up arrow in the toolbar).
- Scroll through the share sheet and tap “Add to home Screen”. If you don’t see the option in the list, it can be added from the “edit Actions” option at the bottom of the list.
- Edit the icon title to your liking and tap “Add”.
- You can move the icon around and put it in folders just like an app icon, but it just will not be appearing in the App library.
Buyer How-Tos
Registering a Buyer Type Account
- Click, or tap, on a Register button on the Platform to launch the Registration popup.
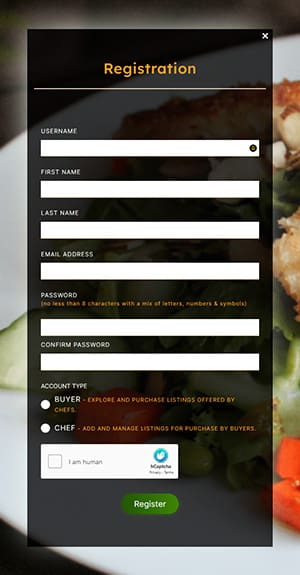
- Complete the USERNAME (usernames need to be unique on the Platform), FIRST NAME, LAST NAME (surname), EMAIL ADDRESS, PASSWORD (no less than 8 characters with a mix of letters, numbers, and symbols), and the CONFIRM PASSWORD fields.
- Select the Buyer radio button in the ACCOUNT TYPE field, as Buyer type accounts can explore and purchase listings offered by Chefs on the Platform, whereas Chef type accounts can add and manage listings for purchase by Buyers. The registration process for a Chef type account is slightly more complex, and to view the exact Chef registration process, scroll to the How-To section titled Registering a Chef Type Account.
- The popup will expand to include a CONSENT field. Be sure to read the Privacy Policy and the User Terms and Conditions of Service, before selecting the checkbox to confirm your consent.
- Complete the hCaptcha for security reasons to prove you are human before clicking, or tapping, on the Register button.
- Should the registration process be successful, you will automatically be logged in to the platform and able to continue as a registered Buyer type user thereof.
Updating a Buyer Profile
- Hover over your username in the header menu on a desktop
to expand the Buyer desktop user menu,
or tap the menu bar icon on a mobile device

to expand the mobile header menu
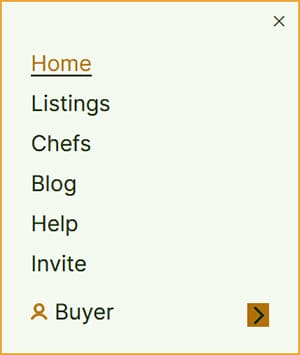
and tap on your username
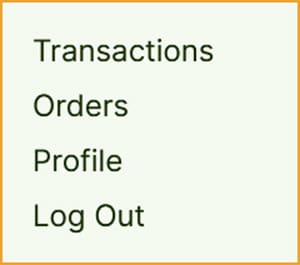
to expand the Buyer mobile user menu.
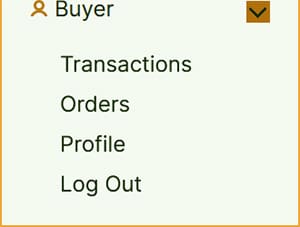
- Click, or tap, on the Profile menu to open your Buyer profile page.
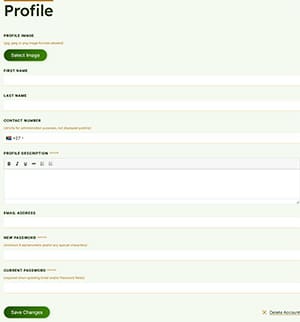
(Note that the Profile form for a verified Chef account contains different fields, and to view the exact Chef profile process, scroll to the How-To section titled Updating a Chef Profile.)
- The Profile form for a verified Chef account contains different fields, and to view the exact Chef profile process, scroll to the How-To section titled Updating a Chef Profile.
- Some fields may be prepopulated with information supplied in the Registering a Buyer Type Account process but are still editable.
- Ensure that the PROFILE IMAGE, FIRST NAME, LASTNAME (surname), CONTACT NUMBER (not displayed publicly), and EMAIL ADDRESS fields are completed.
- The PROFILE DESCRIPTION field is an optional field for Buyer account profiles.
- The NEW PASSWORD field only needs completion should you be updating or changing your current password, and the CURRENT PASSWORD field only needs completion should you be updating or changing either your EMAIL ADDRESS field or updating or changing your password by completing the NEW PASSWORD field.
- Click, or tap, on the Save Changes button.
Ordering a Listing
- Perform a Listings Search with your desired search criteria. To view the exact Listings search process, scroll to the How-To section Searching for Listings.
- In the displayed search results, select (click or tap on) the listing you are interested in to view the listing details page.
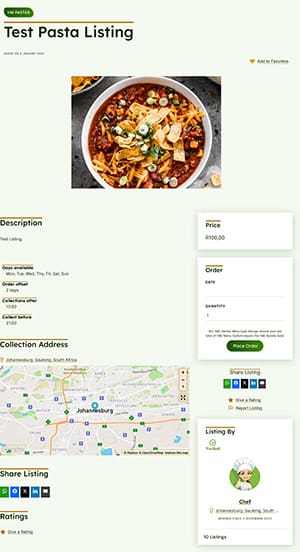
- Once satisfied with the listing selected, navigate to the Order form on the page. Note that the order form could differ slightly, depending on the listing category type.
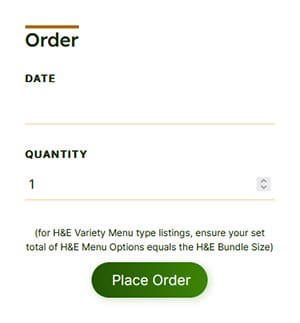
- Select a DATE that the listing is available from the drop-down calendar and complete the QUANTITY field. The calendar will not allow selection of weekdays for which the listing is not available, or the Chef might be closed for business, and the Chef’s required purchase offset is taken into account. For H&E Variety Menu type listings, there is an indication of the H&E bundle size offered, and if a variety of available options, and the total number of option selections needs to be equal to the H&E bundle size offered before being allowed to proceed. Some listing may have optional extras offered that you could select in the order from.
- Click, or tap, on the Place Order button to proceed to the Order Confirmation page. Should you wish to change the date or quantity ordered, you can click, or tap, on the Change link (bottom right).
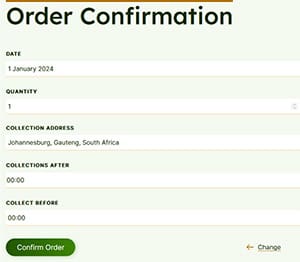
(If you are not currently logged in to your account, you will be prompted to do so or to register an account, should you not currently have one before seeing the Order Confirmation page.)
- On the order confirmation page, confirm the DATE and QUANTITY ordered and note the COLLECTION ADDRESS, the COLLECTIONS AFTER, and COLLECT BEFORE fields and if satisfied, click, or tap, on the Confirm Order button to proceed to the CHECKOUT page.
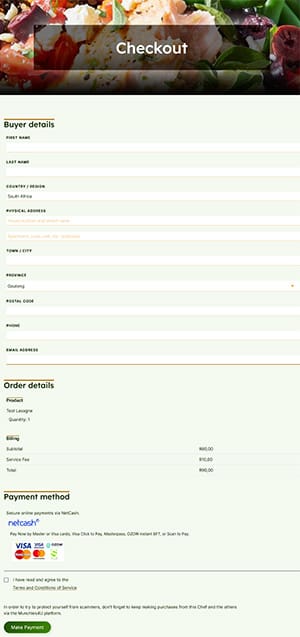
- On the checkout page, complete the FIRST NAME, LAST NAME, PHYSICAL ADDRESS, TOWN / CITY, PROVINCE (select), POSTAL CODE, PHONE and EMAIL ADDRESS fields.
- You can also see the listing you ordered and the quantity, together with the amount to be billed.
- Be sure to read the User Terms and Conditions of Service before selecting the checkbox to confirm your consent.
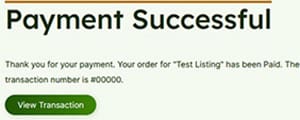
- Click, or tap, on the Make Payment button to be directed to the payment aggregator (NetCash)’s page, where you can select the payment method and capture your credit or debit card or banking details to affect the payment before being directed back to the Payment Successful page.
Chef How-Tos
Registering a Chef Type Account
- Click, or tap, on a Register button on the Platform to launch the Registration popup.

- Complete the USERNAME (usernames need to be unique on the Platform), FIRST NAME, LAST NAME (surname), EMAIL ADDRESS, PASSWORD (no less than 8 characters with a mix of letters, numbers, and symbols), and the CONFIRM PASSWORD fields.
- Select the Chef radio button in the ACCOUNT TYPE field, as Chef type accounts can add and manage listings for purchase by Buyers whereas Buyer type accounts can explore, and purchase listings offered by Chefs on the Platform. The registration process for a Buyer type account is slightly less complex, and to view the exact Buyer registration process, scroll to the How-To section titled Registering a Buyer Type Account.

- The popup will expand to include the CHEF ACCOUNT TYPE, CONTACT NUMBER, CATEGORY/CATEGORIES, CHEF ACCOUNT VERIFICATION DOCUMENTS (for the documentation required for the registration of a Chef type account), ADDRESS OF OPERATION CONFIRMATION, SOCIAL PROFILES and the CONSENT fields.
- Select between the “Registered Business” or “Private Concern” in the CHEF ACCOUNT TYPE field, as the CHEF ACCOUNT VERIFICATION DOCUMENTS required for each differs.
- Complete the CONTACT NUMBER field, select between the “Homemade Meals (HM)” and “Heat & Eats Meals (H&E)” categories that best describe the type listings you will be offering in the CATEGORY/CATEGORIES field, or choose both should you intend on offering both.
- Upload clear copies of the required documentation.
- Select between the “No” or “Yes” option in the ADDRESS OF OPERATION CONFIRMATION field. Should you choose the “Yes” option, the form will again expand to include the ADDRESS OF OPERATION field for you to complete with the correct address of operation.
- Select the “Yes please” radio button option in the SOCIAL PROFILES field should you want Munchies4U to like and/or follow your social profiles, or select the “No thank you” radio button option in the SOCIAL PROFILES field should not want Munchies4U to like and/or follow your social profiles. Should you selected the “Yes please” option, the form will expanded further to include fields where you can input the direct links to the social accounts you would like Munchies4U to follow. The available options are Facebook, X/Twitter, Instagram, Tumbler, YouTube, LinkedIn and/or a WhatsApp Group.
- Read the Privacy Policy and the Chef Terms and Conditions of Service before selecting the checkbox to confirm your consent.
- Complete the hCaptcha for security reasons to prove you are human.
- Click, or tap, on the Register button and be patient, as the documents you are submitting need to be uploaded to the Platform and the time required to complete the process could depend on several factors.
- Should the registration process be successful, you will automatically be logged in to the Platform and able to continue as a registered user thereof. Note that you will not be able to make use of the Platform as a verified Chef until the documents you submitted in the registration process have been verified. This process normally takes no longer than one business day, but could take up to three business days, and once completed, or if there are any issues that need clarification, you will be notified by means of an email.
Updating a Chef Profile
(Note that we suggest doing all Chef type administrations on a Tablet or Desktop system.)
- Hover over your username in the header menu on a desktop
to expand the Chef desktop user menu,
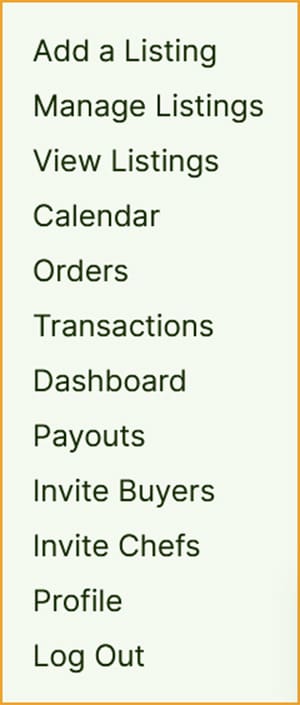
or tap the menu bar icon on a mobile device

to expand the mobile header menu
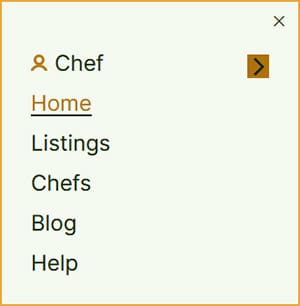
and tap on your username
to expand the mobile Chef user menu.
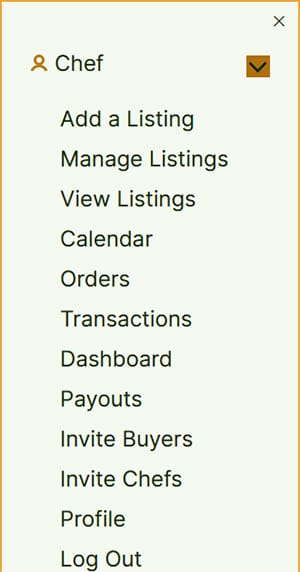
- Click, or tap, on the Profile menu item to open your Chef profile page.
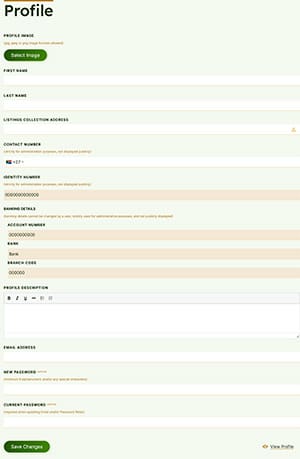
(Note that the Profile form for a Buyer account contains different fields, and to view the exact Buyer profile process, scroll to the How-To section titled Updating a Buyer Profile.)
- Some fields may be prepopulated with information supplied in the Registering a Chef Type Account process, but some are still editable.
- Ensure that the PROFILE IMAGE, FIRST NAME, LASTNAME (surname), LISTINGS COLLECTION ADDRESS, CONTACT NUMBER (not displayed publicly), PROFILE DESCRIPTION and EMAIL ADDRESS fields are completed.
- Ensure that the IDENTITY NUMBER and BANKING DETAILS fields as verified, are correct, as these fields are non-editable by you. Should the entries be incorrect, you may notify or contact us via the User Accounts form on the Contact Us page, or by emailing Us directly at UserAccounts@Munchies4U.co.za.
- The NEW PASSWORD field only needs completion should you be updating or changing your current password, and the CURRENT PASSWORD field only needs completion should you be updating or changing either your EMAIL ADDRESS field or updating or changing your password by completing the NEW PASSWORD field.
- Click, or tap, on the Save Changes button.
Adding a Listing
(Note that we suggest doing all Chef type administrations on a Tablet or Desktop system.)
- Hover over your username in the header menu on a desktop
to expand the Chef desktop user menu,

or tap the menu bar icon on a mobile device

to expand the mobile header menu

and tap on your username
to expand the mobile Chef user menu.

- Click, or tap, on the Add Listing menu to open the Add a Listing page.
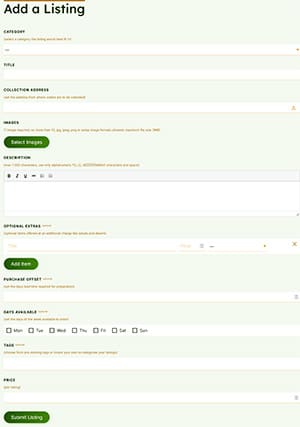
- Select a category the listing would best fit in from the CATEGORY field drop-down list. Note that the Add a Listing page for listings of the various categories differs, and the form will reload once you have selected the category. Should you select the H&E Variety Menu category, the form will include additional fields to complete regarding the variety options offered.
- Complete the TITLE, COLLECTION ADDRESS, IMAGES, DESCRIPTION and PRICE fields as they are compulsory, whereas the STARCHES, VEGETABLES, OPTIONAL EXTRAS, PURCHASE OFFSET, DAYS AVAILABLE, COLLECTIONS AFTER, COLLECTIONS BEFORE, and TAG fields could be completed as they are optional. The H&E BUNDLE SIZE field that would appear when the CATEGORY field has been set to any H&E type categories would be compulsory, and should the CATEGORY have been set to any HM categories, the ORDER CUT_OFF TIME field would be optional. Should the CATEGORY be set to H&E Variety Menu, the H&E MENU OPTIONS field would also be compulsory.
Field descriptions
CATEGORY: Select the category the listing will best fall under.
TITLE: Give your listing its own unique name (title).
COLLECTION ADDRESS: Supply the physical address the listing is to be collected from (you may click, or tap, on the arrow on the right of the input area to use the auto-locate function).
IMAGES: Upload clear images of the listing on offer.
DESCRIPTION: Supply an accurate description of the listing on offer.
STARCHES (optional): List the possible starches included in the listing.
VEGETABLES (optional): List the possible starches included in the listing.
OPTIONAL EXTRAS (optional): List any possible extras that a Buyer can select at an additional charge when ordering the listing, like salads, desserts, etc. OPTIONAL EXTRAS can be offered per portion or per order.
PURCHASE OFFSET (optional): Days required (notification) for preparation.
DAYS AVAILABLE (optional): Set the days of the week the listing is available for order.
ORDER CUT-OFF TIME (only available for all HM listing categories, optional): The time of day that orders for the listing need to be in before.
H&E BUNDLE SIZE (only available for all H&E listing categories): The number of portions in the H&E bundle.
H&E MENU OPTIONS (only available for the H&E Variety Menu category): A list of menu options available to choose from that need to equal the value set in the H&E BUNDLE SIZE field.
COLLECTIONS AFTER (optional): Set the time after which orders can be collected.
COLLECTIONS BEFORE (optional): Set the time before which orders need to be collected.
TAGS (optional): Additional custom tags that can be used to further group listings, like vegetarian, vegan, keto, kosher, etc.
PRICE: The listing price.
- Click, or tap, on the Submit Listing button.
Updating/Editing a Listing
(Note that we suggest doing all Chef type administrations on a Tablet or Desktop system.)
- Hover over your username in the header menu on a desktop
to expand the Chef desktop user menu,

or tap the menu bar icon on a mobile device

to expand the mobile header menu

and tap on your username
to expand the mobile Chef user menu.

- Click, or tap, on the Manage Listings menu item to open the Manage Listings page.

- Click, or tap, on the listing you would like to update in the list of listings to open the listing edit page.
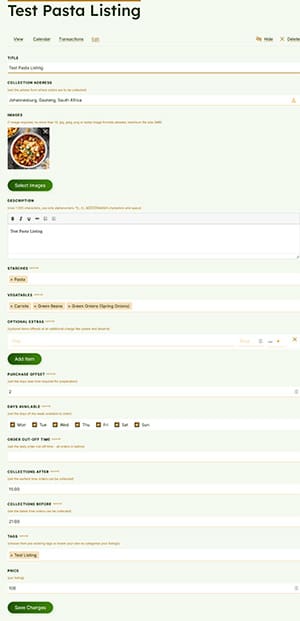
- Here you can update/edit the TITLE, COLLECTION ADDRESS, IMAGES, DESCRIPTION and PRICE fields that are compulsory, whereas the STARCHES, VEGETABLES, OPTIONAL EXTRAS, PURCHASE OFFSET, DAYS AVAILABLE, COLLECTIONS AFTER, COLLECTIONS BEFORE, and TAG fields could be edited as they are optional. The H&E BUNDLE SIZE field that would appear when the listing category was a H&E type categories would be compulsory, and should the category have been set to any HM categories, the ORDER CUT_OFF TIME field would be optional. Should the category have been set to H&E Variety Menu, the H&E MENU OPTIONS field would also be compulsory.
Field descriptions
TITLE: Your own unique name (title) to the listing.
COLLECTION ADDRESS: Supply the physical address the listing is to be collected from (you may click, or tap, on the arrow on the right of the input area to use the auto-locate function).
IMAGES: Upload clear images of the listing on offer.
DESCRIPTION: Supply an accurate description of the listing on offer.
STARCHES (optional): List the possible starches included in the listing.
VEGETABLES (optional): List the possible starches included in the listing.
OPTIONAL EXTRAS (optional): List any possible extras that a Buyer can select at an additional charge when ordering the listing, like salads, desserts, etc. OPTIONAL EXTRAS can be offered per portion or per order.
PURCHASE OFFSET (optional): Days required (notification) for preparation.
DAYS AVAILABLE (optional): Set the days of the week the listing is available for order.
ORDER CUT-OFF TIME (only available for all HM listing categories, optional): The time of day that orders for the listing need to be in before.
H&E BUNDLE SIZE (only available for all H&E listing categories): The number of portions in the H&E bundle.
H&E MENU OPTIONS (only available for the H&E Variety Menu category): A list of menu options available to choose from that need to equal the value set in the H&E BUNDLE SIZE field.
COLLECTIONS AFTER (optional): Set the time after which orders can be collected.
COLLECTIONS BEFORE (optional): Set the time before which orders need to be collected.
TAGS (optional): Additional custom tags that can be used to further group listings, like vegetarian, vegan, keto, kosher, etc.
PRICE: The listing price.
- Click, or tap, on the Save Changes button.
Viewing Your Listing/s
(Note that we suggest doing all Chef type administrations on a Tablet or Desktop system.)
- Hover over your username in the header menu on a desktop
to expand the Chef desktop user menu,

or tap the menu bar icon on a mobile device

to expand the mobile header menu

and tap on your username
to expand the mobile Chef user menu.

- Click, or tap, on the View Listings menu to open the Listings by Chef (your username) page.
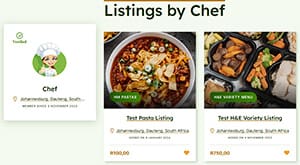
- The Listings by Chef (your username) page displays all your active listings on the platform. Note the pagination at the bottom of the page if you have more than 8 listings.
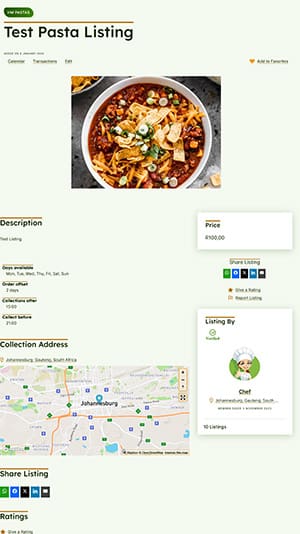
- Click, or tap, on a listing to open the listing view page.
Managing Your Listings
(Note that we suggest doing all Chef type administrations on a Tablet or Desktop system.)
- Hover over your username in the header menu on a desktop
to expand the Chef desktop user menu,

or tap the menu bar icon on a mobile device

to expand the mobile header menu

and tap on your username
to expand the mobile Chef user menu.

- Click, or tap, on the Manage Listings menu to open the Manage Listings page.

- Click, or tap, on the listing you would like to manage in the list of listings to open the listing edit page.

- In the listing management menu,
you can click, or tap, on View to view the listings; you can click, or tap, on Calendar to view all current day and future orders for the listing; you can click, or tap, on Transactions to view all transactions for the listing; you can click, or tap, on Edit (default) to edit the listing’s details; you can click, or tap, on Hide to temporarily hide the listing from view by Buyers, or you can click, or tap, on Delete to permanently remove the listing from the platform.
Viewing Your General Calendar
(Note that we suggest doing all Chef type administrations on a Tablet or Desktop system.)
- Hover over your username in the header menu on a desktop
to expand the Chef desktop user menu,

or tap the menu bar icon on a mobile device

to expand the mobile header menu

and tap on your username
to expand the mobile Chef user menu.

- Click, or tap, on the Calendar menu to open the Calendar page.
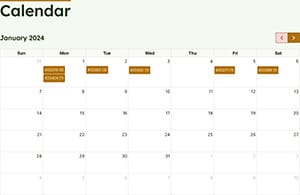
- The General Calendar page displays all current and future-dated transactions (not past) for all your listings.
- Click, or tap, on a transaction to open the transaction details page with a summary view of the order.
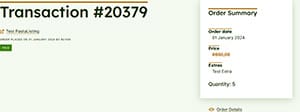
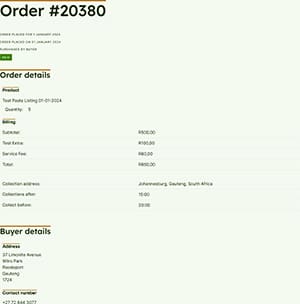
- You can click, or tap, on the Order Details link to open the Order Details page should you require more information on the order than displayed in the order summary on the Transaction page.
Viewing a Listing’s Calendar
(Note that we suggest doing all Chef type administrations on a Tablet or Desktop system.)
- Hover over your username in the header menu on a desktop
to expand the Chef desktop user menu,

or tap the menu bar icon on a mobile device

to expand the mobile header menu

and tap on your username
to expand the mobile Chef user menu.

- Click, or tap, on the Manage Listings menu item to open the Manage Listings page.

- Click, or tap, on the listing you would like to view’s Calendar icon on desktop or tap the Calendar icon on a mobile device
to open the listing’s calendar page.
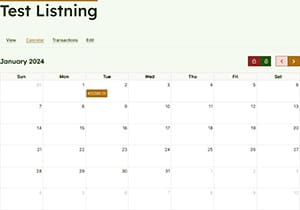
- The Listing Calendar page displays all current and future-dated transactions (not past) for the listing.
- Click, or tap, on a transaction to open the transaction details page.

- You can click, or tap, on the View Order link to view the Order Details page should you require more information on the order than displayed on the Transaction page.

- On the Listing Calendar page, you can block days that the listing will not be available should you be taking a break. Select the day in the calendar and click, or tap, on the lock icon to turn the day red in the calendar. Should you wish to unblock a day you have previously blocked, select the day in the calendar and click, or tap, on the unlock icon.
Viewing Your Orders
(Note that we suggest doing all Chef type administrations on a Tablet or Desktop system.)
- Hover over your username in the header menu on a desktop
to expand the Chef desktop user menu,

or tap the menu bar icon on a mobile device

to expand the mobile header menu

and tap on your username
to expand the mobile Chef user menu.

- Click, or tap, on the Orders menu to open the Orders page.

- The Orders page will display a list of all your orders, sorted by the date they were placed. So, the newest orders, irrespective of the listing they are for, will be at the top of the list. To view the details of a specific order, click, or tap, on the order number to open the order details page.

- A more efficient way to check all the orders for a listing on a given day would be to use the listing’s calendar page, and to view that exact process, scroll to the How-To section titled Viewing a Listing’s Calendar, and in that process, you can also navigate as far as the order details page.
Viewing Your Transactions
(Note that we suggest doing all Chef type administrations on a Tablet or Desktop system.)
- Hover over your username in the header menu on a desktop
to expand the Chef desktop user menu,

or tap the menu bar icon on a mobile device

to expand the mobile header menu

and tap on your username
to expand the mobile Chef user menu.

- Click, or tap, on the Transactions menu to open the Transactions page.
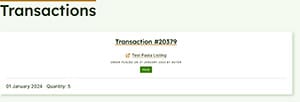
- The Transactions page displays a list of all the successful transactions in the date order for which they are placed.
- On the transaction page, you can note the listing title and date for which the order is placed, as well as the quantity. To get a summary of the order attached to the transaction, click, or tap, on the Transaction #xxxxx (number) link to open the Transaction page.

- You can click, or tap, on the View Order link to view the Order Details page should you require more information on the order than what is displayed in the order summary on the Transaction page.

(Note that the Transaction and Order numbers do differ.)
Viewing Your Dashboard
(Note that we suggest doing all Chef type administrations on a Tablet or Desktop system.)
- Hover over your username in the header menu on a desktop
to expand the Chef desktop user menu,

or tap the menu bar icon on a mobile device

to expand the mobile header menu

and tap on your username
to expand the mobile Chef user menu.

- Click, or tap, on the Dashboard menu item to open the Dashboard page.
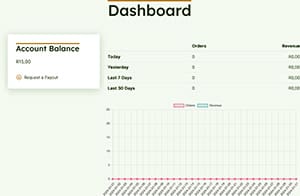
- The Dashboard page displays your account balance (left), and a summary of orders in the last month as well as a graphical representation of the total amount of orders and their total value. Note that the values all include the Platform service fees, hence the amounts in the summary and graphical view will differ from your account balance.
- Should your account balance exceed R0,00, the Request a Payout link will appear below the balance. Note that all payouts are governed as per the Payouts Section in the Chef Terms and Conditions of Service.
- To view the exact Request a Payout process, scroll to the How-To section titled Requesting a Payout.
Requesting a Payout
(Note that we suggest doing all Chef type administrations on a Tablet or Desktop system.)
- Hover over your username in the header menu on a desktop
to expand the Chef desktop user menu,

or tap the menu bar icon on a mobile device

to expand the mobile header menu

and tap on your username
to expand the mobile Chef user menu.

- Click, or tap, on the Dashboard menu item to open the Dashboard page.

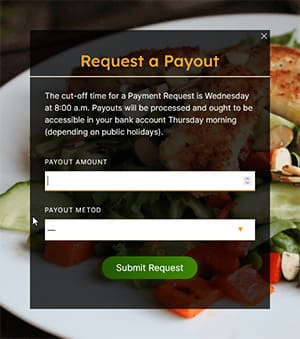
- Should you be viable for a payout, the Request a Payout link will appear below your account balance. Note that all payouts are governed as per the Payouts Section in the Chef Terms and Conditions of Service.
- Click, or tap, on the Request a Payout link to open the Request a Payout popup.
Inviting Buyers
(Note that this method will be anonymous, as Munchies4U will invite Buyers to join the platform. Should you wish that the Buyers know that the invite comes from you, we suggest using your own email client and account to invite them, so they can see that the invite comes from you.)
- Hover over your username in the header menu on a desktop
to expand the Chef desktop user menu,

or tap the menu bar icon on a mobile device

to expand the mobile header menu

and tap on your username
to expand the mobile Chef user menu.

- Click, or tap, on the Invite Buyers menu item to open the Buyer Invitation popup.
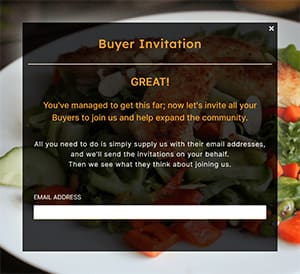
- Complete the EMAIL ADDRESS field. This method will allow you to send a maximum of 10 invitations at a time due to spam limitations, but once you have sent the first 10 invitations and wish to send more, you can reload the form, but once you have entered the first email address, the send button will appear.
- When you have entered all the email addresses you would like, click, or tap, on the Send button.
Inviting Chefs
(Note that this method will be anonymous, as Munchies4U will invite Chefs to join the platform. Should you wish that the Chefs know that the invite comes from you, we suggest using your own email client and account to invite them, so they can see that the invite comes from you.)
- Hover over your username in the header menu on a desktop
to expand the Chef desktop user menu,

or tap the menu bar icon on a mobile device

to expand the mobile header menu

and tap on your username
to expand the mobile Chef user menu.

- Click, or tap, on the Invite Chefs menu item to open the Chef Invitation popup.
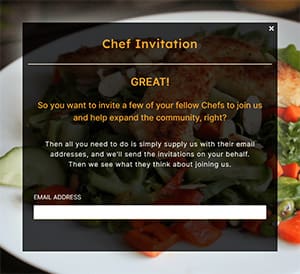
- Complete the EMAIL ADDRESS field. This method will allow you to send a maximum of 10 invitations at a time due to spam limitations, but once you have sent the first 10 invitations and wish to send more, you can reload the form, but once you have entered the first email address, the send button will appear.
- When you have entered all the email addresses you would like, click, or tap, on the Send button.
2. Frequently Asked Questions (FAQs)
Here we try to answer all the frequently asked questions, to see if we can help you out without the need to contact us, or if you have already contacted us, to possibly solve things before we’ve even received your message.
General FAQs
Is there a Munchies4U Mobile App?
No, there is not a Munchies4U mobile app.Due to the monthly costs involved in the listing of any mobile apps on the various App/Play Stores, Munchies4U has decided not to go that route, as such costs would need to be passed one to someone, and unfortunately that would ultimately be onto you as the the Buyers making use of the Platform in this case.
The Munchies4U Platform has however been fully developed as per the newer Progressive Web App (PWA) standards, which means it is a website that can be used just like an app on most mobile devices through the various web browser available to you. So no more need to download, install and constantly keep apps updated on your devices.
Some browsers unfortunately, like Safari on iOS & iPadOS devices, Microsoft Edge on all devices and a few other browsers on specific devices, are still a bit lagging in their adoption of these PWA standards, thus some users could possibly experience some difficulty with certain functions of the Platform on certain devices, but that all should be resolved in the not to distant future if you keep your browsers updated. You can do that by visiting Browser-update.org.
We recommend you simply bookmark the Platform in the browser, or simply add a shortcut icon to your mobile device’s home screen for your quicker, easier access of the Platform. To add a shortcut, you can follow the relevant instructions in the General How-Tos section titled Adding a Shortcut to Your Mobile Device’s Home Screen.
What is the difference between Homemade Meals (HM) and Heat & Eat Meals (H&E)?
This answer pertains primarily to the Munchies4U Platform, as it could have various other definitions beyond that.
So, on the Munchies4U Platform, what we refer to as Homemade Meals (HM) would be freshly prepared meals preferably intended for same-day consumption. However, depending on their collection or delivery times and your preferred consumption times, they might require some reheating for optimal enjoyment.
On the Munchies4U Platform, what we refer to as Heat & Eat Meals (H&E) would be meals that have been prepared in advance, normally come portioned for a single individual, packaged and frozen, and can be stored in such form for a certain number of days before being defrosted and heated for your consumption and optimal enjoyment when you should choose to do so. In England, people typically refer to these types of meals as TV dinners, while in the United States and Canada, they are known as frozen meals, or in other parts of the world, they are also known as microwave meals, ready meals, precooked frozen meals, and a few other names.
Buyer FAQs
Chef FAQs
3. Contact Details
If, for some reason, You don’t manage to sort things out with any of the information supplied on this page, You may notify or contact Us via one of the relating forms on the Contact Us page on The Platform or by emailing Us directly at General@Munchies4U.co.za.