Autumns and winters bring shorter days and colder nights, making many of us just want to hibernate in front of the television rather than venture outside. Streaming services have made it easier than ever to spend hours in front of the TV binging on our favourite shows.
But binge watching also unintentionally makes us overeat on unhealthy snacks. However, when we’re focused on what’s happening on the screen, we tend not to pay attention on just how much we’re putting in to our mouths. This can be really bad when we’re try to manage out weight, as the snacks or often unhealthy, high in calories and fats, and low in nutrition. Add this to the fact that we’re not moving much in these cooler times of the year, and the ponds can quickly start adding up.
This doesn’t mean we need to stop snacking all together! No, we can just start snacking smarter on healthier, lower calorie and fat, more nutritious snacks, and portion them, instead of grabbing straight from the packs to avoid having to many snacks in one sitting. We can also limit our snacks to certain times, as no matter how healthy they are, snacking for hours on end is never ago idea.
However we choose to Netflix and chill, here are some healthier snack ideas, so we can enjoy without all that added guilt.
Salt and vinegar baby marrow (zucchini) chips
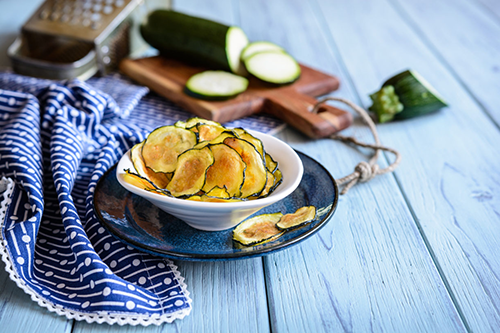
A fan of salt and vinegar chips? You’re bound to like this lighter version using baby marrows. Each half cup serving contains about 40 calories, compared to over 150 calories for potato chips, and is low in carbs with all the nutritional benefits of baby marrows.
These easy, crispy, salt and vinegar baby marrow crisps are also gluten free, grain free. You quickly can make them in the air fryer, or if you don’t own one, the oven.
Recipe
What we need:
- 1 x Handful of baby marrows
- Some oil, vinegar and salt.
The method:
Slice the baby marrow, as thin as possible, into slices of a uniform thickness. Using a mandolin would be the easiest.
Air Fryer
- Preheat the air fryer to 120°C.
- Toss the slices in an oil and vinegar mix and lay them in the air fryer basket, slightly overlapping is fine.
- Sprinkle with some salt (not too much) and air fry them for about 10 minutes.
- Flip them all over and air fry for another 10 minutes, or until they’re the desired crispiness.
- Turn off the air fryer and let the baby marrow chips cool down.
- Transfer them to a bowl, and ENJOY!
Oven
- Preheat the oven to 100°C.
- Line some cookie trays with parchment (wax) paper.
- Arrange the slices in a single layer (NO overlap) on the cookie trays.
- Sprinkle with some salt (not too much).
- Place the cookie trays in the oven, and bake the baby marrow slices for about 2 – 3 hours, or until they’re the desired crispiness.
- Remove the cookie trays from the oven, turn off the oven and let the baby marrow chips cool down.
- Transfer them to a bowl, and ENJOY!
Frozen yoghurt fruit bites
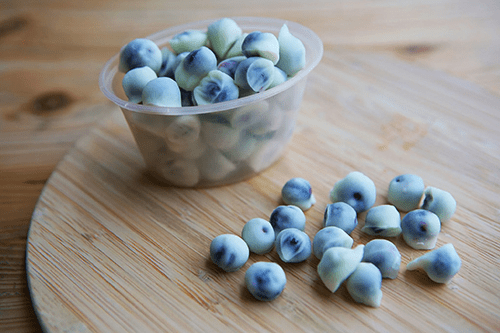
Not in the mood for something sweet? Reach for these frozen yoghurt fruit treats. A dozen bites only add up to a few calories, so they won’t derail our weight management attempts should we reach for some seconds. These snack also packs in some antioxidant from, the fruits, and protein from the yoghurt.
Recipe
What we need:
- Fruit. For the fruit, we can use blueberries, grapes, quarter strawberries, or virtually any bite-sized fruit. I like diced mango, kiwi or watermelon.
- Yoghurt. For the yoghurt we preferably use a plain lower-fat Greek variety, or any yoghurt you have on hand. Should you prefer some sweetness, you can try a vanilla or berry-flavoured variety.
The method:
- To make these frozen yoghurt fruit bites, we just need to dunk the bite sized fruit bits into the yoghurt of choice, using a toothpick to avoid a mess.
- Transfer the dipped fruit bits onto some cookie trays with parchment (wax) paper.
- Pop the cookie tray into the freezer. Only about an hour or so as they freeze rather quick.
- Once frozen, pop them off the parchment paper into a freezer-safe container until ready to snack, and ENJOY!
Baked broccoli tots
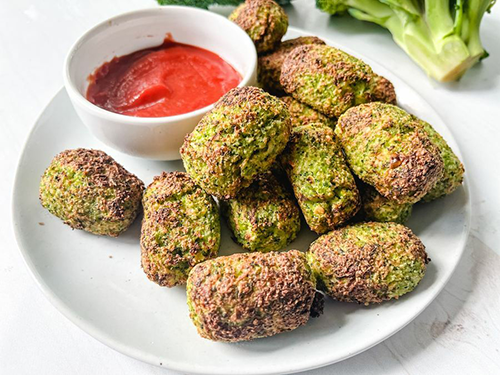
We bake, instead of fry these broccoli tots, as we’re making them at home and they’re an ideal savoury snack without all the sodium (salt) that comes in packaged snacks. These broccoli bites also come with their nutritional benefits, are high in fibre and vitamin C.
Recipe
What we need:
- 2 cups or 340g uncooked or frozen broccoli
- 1 x large egg
- ¼ cup diced yellow onion
- ⅓ cup cheddar cheese
- 1 and a ½ cup breadcrumbs (can be substituted with crushed crackers, crushed pretzels, crushed potato chips, crushed tortilla chips, dry stuffing mix crushed corn flakes or other unsweetened cereals)
- 2 Tbsp parsley or cilantro rosemary ½ tsp salt
- ½ tsp pepper
- Some oregano and basil seasoning (to taste)
The method:
- Preheat the oven to 200°C.
- Line some cookie trays with parchment (wax) paper.
- Blanch (dunk) the broccoli in boiling water for 1 minute, then remove and shock with cold tap water to stop the cooking process, and drain them well.
- Chop broccoli finely and mix thoroughly with the egg, onions, cheddar, breadcrumbs, and seasoning.
- Scoop about 1 1/2 tablespoons of mix using an ice-cream scoop or your hands, and gently press into a firm ball and then shape into a tater-tot shape. It helps to wash your hands after every few tots to keep them from sticking onto your hands.
- Place the cookie trays in the oven, and bake the broccoli tots until they’re golden brown and crispy, about 18-24 minutes, flipping them all over half way.
- Remove the cookie trays from the oven, turn off the oven, and enjoy while hot with some ketchup, ranch dressing, your favourite dipping sauce or if you’re brave, something hot, like a chilli sauce.
Crispy kale chips
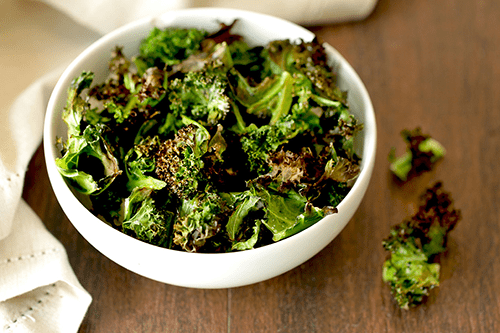
Kale chips are a bonus, as you’re getting in your veggies while enjoying a satisfying, crunchy snack. This recipe uses one bunch of kale to make four servings, each serving containing about 84 calories. So should you have two servings, it’s still below the same amount of popular packaged potato chips brands. Any kale works, Common curly, Lacinato (aka Tuscan or Dinosaur kale), red or Redbor, or Siberian kale. But be sure to remove the woody stems before tearing the leafy greens into chip-size pieces. Bags of pre-chopped kale always include the stems. So not ideal. The weight of a bunch of kale varies, but here are some guidelines. A bunch of curly kale, weighing about 250g, reduces to about 180g after removing the woody stems, and after tearing it into small pieces, you should have about 12 cups of uncooked kale. That cooks down to about 8 cups of kale chips.
Recipe
What we need:
- 1 x bunch Kale
- Some olive oil
The method:
- Preheat the oven to 130°C.
- Line some cookie trays with parchment (wax) paper.
- Fill a large bowl with water and add kale. Swish around to remove any dirt and drain well using a salad spinner or a clean kitchen towel.
- Tear the kale leaves into 2,5 – 5cm pieces, discarding the woody stems, and place in a large bowl. Drizzle with some olive oil and toss with your hands until the pieces are evenly coated.
- Arrange the pieces in a single layer (NO overlap) on the cookie trays. Rub each leaf gently between your fingers as you work through them, to ensure they are well covered with the oil.
- Sprinkle with some salt (not too much) and pepper (to taste).
- Place the cookie trays in the oven and, bake kale for about 18 to 20 minutes, or until leaves are crispy.
- Remove the cookie trays from the oven, turn off the oven and let the kale cool down.
- Transfer them to a bowl, and ENJOY!
Notes:
- 12 cups of uncooked kale cooks down to about 8 cups of chips or four servings, as I like to split them into 2 cups per serving. Because they are so light and thin, they become shatteringly crisp when backed.
- You can store them in an airtight container or a zip-lock bag at room temperature for up to 4 days.
- Kale bakes down to a fraction of its original size, so plan on 2 to 3 cookie trays per bunch of kale (depending on the size of the bunch and the size of your pans). You should manage about 4 cups of the uncooked kale per cookie tray.
- The most important step for super-crispy kale chips, is to arrange them in a single layer on the cookie tray, with no overlapping. Overlapping causes them to steam, and they won’t be crispy.
- Feel free substitute the salt and pepper with some of your favourite seasonings (but not too much as we are trying to be healthier, remember). Smoked paprika, red pepper flakes, Cajun Seasoning, cumin, chili powder, Za’atar or some garlic powder make for some interesting tastes.
Green bean fries with a creamy dipping sauce
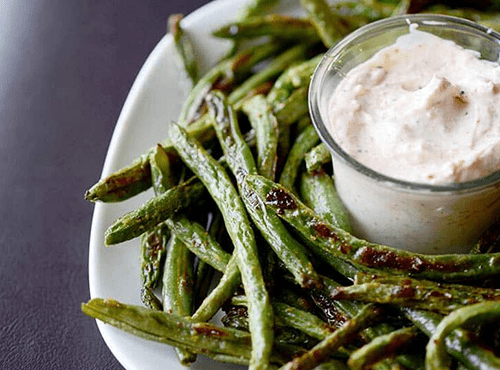
Roasted green bean fries are just as snack worthy as French fries, without those extra calories. Made using coconut oil and nutritional yeast, and the creamy dipping sauce will make you forget about the sugar-loaded ketchups. This idea uses sour cream, but you may use non-fat plain Greek yogurt to reduce the fat even more.
Recipe
What we need:
Creamy dipping sauce
(make this at least 2 hours ahead for the best taste)
- 1 x 500g Green beans (fresh or frozen, canned won’t work)
- 1 Tbsp Coconut oil (liquid preferable)
- Some sea salts
- 1 Tbsp Nutritional yeast (optional, but it adds a unique flavour-really good!)
Beans
- 1 Tbsp parmesan cheese
- ¾ tsp garlic powder
- ¾ tsp onion powder
- ⅓ tsp paprika
- ½ tsp celery seed
- ¼ tsp seasoning salt
- ½ cup sour cream
The method:
Dipping sauce
- Combine all the dipping sauce ingredients in a bowl with a mixer until well-blended.
- Cover and refrigerate for at least 2 hours before serving.
Beans
- Preheat oven to 220°C.
- Line some cookie trays with parchment (wax) paper.
- Trim the edges of the green beans to remove the stems.
- Coat the green beans evenly with coconut oil (if not using liquid make sure to melt it). The easiest way I find to do this, is to put beans and oil into a large Ziploc bag and shake until the they are evenly coated (not recommended when using coconut oil that has been melted into liquid). You can add the optional nutritional yeast to the bag before shaking.
- Place the beans onto cookie tray and sprinkle with sea salt (not too much).
- Place the cookie trays in the oven, and bake the green beans for about 25 minutes for fresh green beans and about 40 or more for frozen, flipping them all over half way.
- The outsides should have dark brown spots once they are done.
- Remove the cookie trays from the oven, turn off the oven and either let the green beans cool down before transferring them to bowl to ENJOY, or ENJOY them while hot with the dipping sauce.
Hummus
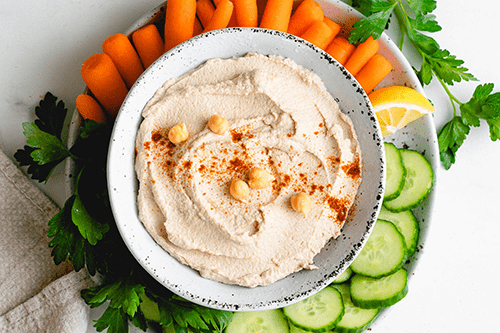
A healthy, yet classic, snack accompaniment. This creamy dip can be paired with raw veggies for some guilt-free munching, and it’s pretty simple to make.
Recipe
What we need:
- 1 x can of good organic chickpeas, rinsed thoroughly and drained. If you have some extra time, transfer them to a saucepan, cover them with water, and bring them to a simmer for about 20 minutes, as brands can vary significantly in their hardness. Alternately, fresh chickpeas that have been slightly overcooked from scratch (to soften them and loosen the skins) in an instant pot or on the stovetop.
- 1 x jar of tahini. Since this ingredient is arguably the most prominent flavour in hummus, purchase a jar of good-quality tahini. Should you struggle to find tahini, you can substitute with Cashew or Almond butter, but the taste of your hummus will obviously not be the same.
- 2 x cloves of garlic, but feel free to double that if you would like more garlicky flavour.
- Fresh lemon juice.
- Some ground cumin.
- Olive oil to incorporate some into the hummus itself, and then drizzle extra on top for serving.
- Some fine sea salt.
- Cold water. This is a game-changing ingredient when it comes to the texture of your hummus. If it’s too thick and not smoothing out, just add in some more water.
The method:
- Puree all the ingredients, except chickpeas in a food processor, until smooth. (Tahini, cold water, olive oil, cumin, salt, garlic and lemon juice.
- Add in the chickpeas and pure for 3 – 4 minutes (recommended), or until smooth. Yep, put that food processor to work! Just keep it going and going until the hummus is nice and smooth, pausing once or twice to scrape the sides down. If the hummus seems too thick, feel free to add in an extra tablespoon or two of water.
- Give the hummus your own unique taste by adding in extra salt, cumin and/or lemon juice if needed.
- Transfer it to a serving bowl, add some olive oil and any toppings that you would like, and enjoy!!
Some topping suggestions are either ground sumac or paprika with maybe a sprinkle of chopped fresh parsley, toasted pine nuts, chopped roasted red peppers, but the skies are the limits.
You could also try some flavour variations by adding some crushed red pepper flakes into the mix or replacing the fresh garlic cloves with cloves of rich, sweet, roasted garlic.
Sweet potato chips
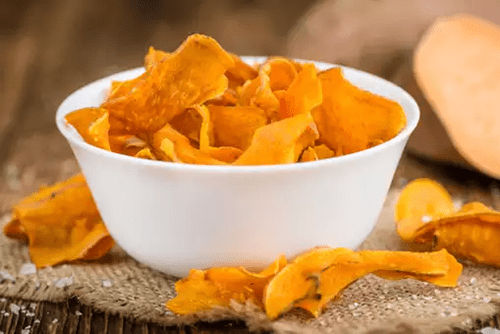
Sweet potatoes are high in fibre and antioxidants. They’re also naturally sweet, so you don’t have to do much to garner their flavour. These sweet potato chips are no exception, made with a light coat of olive oil and a dusting of salt.
Recipe
What we need:
- 2 x large sweet potatoes
- Olive oil
- Plain or flavoured salts
The method:
- Preheat oven to 200°C.
- Line some cookie trays with parchment (wax) paper.
- Peel and slice the sweet potatoes. Make sure to get all the slices a uniform thickness. Using a mandolin would be the easiest, and you can adjust the thickness to your liking. Just remember, the thicker the slices, the longer they take to bake too crispy.
- Coat the slices evenly with the olive oil. The easiest way I find to do this, is to put slices and oil into a large Ziploc bag and shake until the they are evenly coated.
- Arrange the slices in a single layer (NO overlap) on the cookie tray.
- Place the cookie tray in the oven, and bake the sweet potato slices for about 20 minutes, or until they’re the desired crispiness, flipping them all over half way.
- Remove the cookie trays from the oven, turn off the oven and let the sweet potato chips cool down.
- Transfer them to a bowl, and ENJOY!
These crisps can last a week or two in an airtight container, and can be served with some delicious dips or sauces like, smoked paprika dip, maple mustard sauce or chipotle lime dip.
Cucumber chips
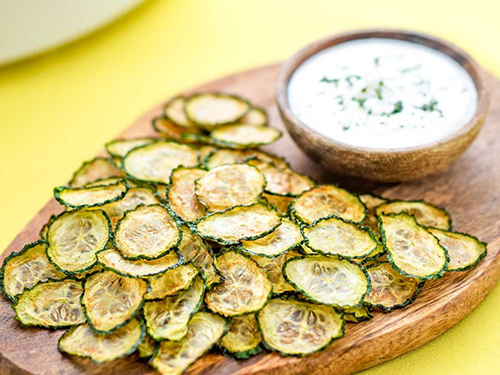
Cucumbers are very low in calories, after all, they’re mostly water. This recipe is for some baked, until crisp, cucumbers seasoned with only spices or just plain salt (not too much) and vinegar. You can snack on these crisps without worrying about blowing your calories for the day.
Recipe
What we need:
- 2 x large, or 4 x small cucumbers
- Seasoning of choice (see options below for some ideas)
Option 1: Smokey Cucumber Chips
- 1 tsp smoked paprika
- 1 tsp garlic powder
- Salt to taste
Option 2: Onion and garlic
- 1 tsp onion powder
- 1 tsp garlic powder
- Salt to taste
Option 3: Salt and vinegar
- 1 Tbsp apple cider vinegar
- Salt to taste
Option 4: Lemon and pepper
- 1 Tbsp fresh lemon juice
- ½ tsp ground black pepper
The method:
- Preheat oven to 80°C.
- Line some cookie trays with parchment (wax) paper.
- Slice cucumbers into slices of about 3 mm thick, ensuring a uniform thickness across all the slices. Using a mandolin would be the easiest.
- Pat the cucumbers dry and place them in a bowl.
- Mix well with your chosen spices.
- Arrange the slices in a single layer (NO overlap) on the cookie trays.
- Place the cookie trays in the oven, and bake cucumber slices for about 3-4 hours (depending on how large the cucumbers were), or until they’re the desired crispiness.
- Remove the cookie trays from the oven, turn off the oven and let the cucumber chips cool down.
- Transfer them to a bowl, and ENJOY!
Chili-lime roasted chickpeas
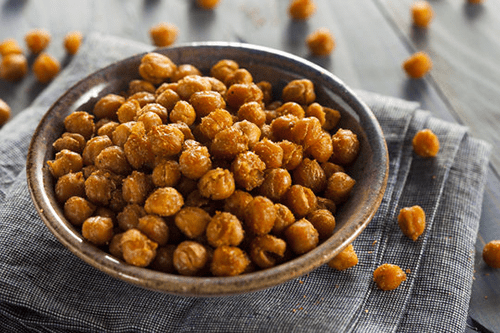
These chickpeas make for a great snack and they’re very easy to make, just roast chickpeas until crunchy and coat with the mixed topping. Chickpeas are also high in protein and fibre, helping you stay full for longer.
Recipe
What we need:
- 2 x 500g tins of chickpeas, rinsed thoroughly and drained
- 3 – 4 tsp chili powder *
- 2 Tbsp olive oil
- 1 Tbsp + 1 tsp lime juice
- ¾ tsp sea salt
- 1 – 2 tsp cumin *
- Pinch of dried herbs of your choice. I used a little rosemary and thyme, or some chopped fresh cilantro
* Start with the lowest amount of spices and add more to taste.
The method:
- Preheat oven to 80°C.
- Line some cookie trays with aluminium (tin) foil and spry with cooking spray.
- Spread the chickpeas out in a single layer over the cookie tray.
- Place the cookie tray in the oven, and bake the chickpeas for about 45 – 50 minutes, stirring and flipping them every 10 minutes or so. Baking time may vary, depending on brand. So, what I do is take a few out after about 40 minutes, let them cool for a minute and then bite into them to make sure they are really crunchy.
- Near the end time of the chickpeas’ cooking time, combine the olive oil, chilli powder, lime juice, sea salt, and cumin in a medium sized bowl, and whisk to mix thoroughly.
- When the chickpeas are done, let them cool for just a minute before pouring them into the bowl with the oil mixture and stir to coat all the chickpeas well.
- Remove them from the bowl and ENJOY immediately while still hot, or let them cool down and store them in an airtight container to ENJOY later.
Crunchy soybeans (edamame)
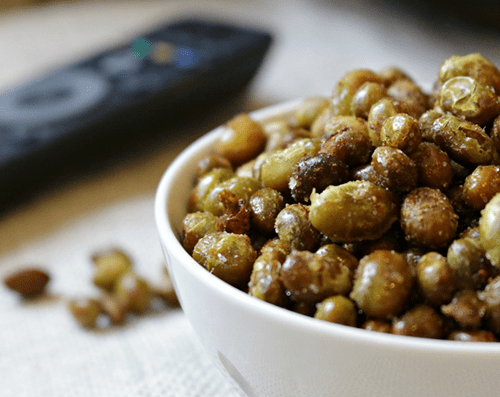
Just like the chickpeas, edamame can be roasted and turned into a crunchy, high protein, low calorie snack. This recipe is simple with just a couple of ingredients, but you can play with other herbs and spices for some added flavours.
Recipe
What we need:
- 1 x 500g bag of frozen skinned edamame
- 2 tsp olive oil
- 1 tsp salt
- ½ tsp chilli powder
The method:
- Preheat oven to 190°C.
- Place edamame in a strainer and run under warm water to defrost.
- Spread on paper towels to dry.
- Toss the edamame with the olive oil. Salt and chilli powder in a medium sized bowl until well coated
- Spread the edamame out in a single layer over a cookie tray.
- Roast until puffed and partly browned, about 20 – 25 minutes, shaking the cookie tray once or twice during roasting to prevent the possibility of scorching.
- Remove the cookie trays from the oven, turn off the oven and let the edamame cool down.
- Transfer them to a bowl, and ENJOY!
Cinamon Apple chips
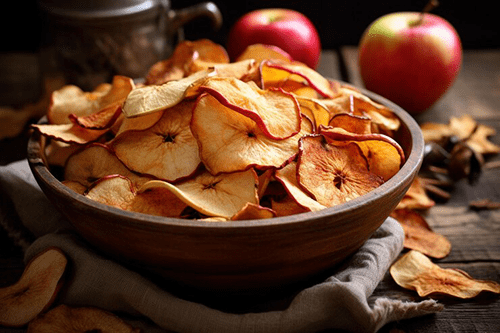
They may look like a bowl of potato chips, but they’re just a couple of apples. Apple chips provide a host of nutritional benefits over their potato rivals, like vitamin C, fibre, and antioxidants that have been shown to boost heart, brain, and digestive health.
Recipe
What we need:
- Apples
- Cinamon powder
The method:
- Preheat oven to 80°C.
- Line some cookie trays with parchment (wax) paper.
- Wash, core and thinly slice the apples. Using a mandolin would be the easiest.
- Arrange the slices in a single layer (NO overlap) on the cookie trays.
- Sprinkle with cinnamon.
- Place the cookie tray in the oven, and bake. The time depends on the thickness of the apple slices. They’ll be ready when a single chip removed from the oven is crisp after cooling at room temperature for about 2 – 3 minutes.
- Remove the cookie trays from the oven, turn off the oven and let the apple chips cool down for about an hour.
- Transfer them to a bowl, and ENJOY!
Chili and lime popcorn made with coconut oil
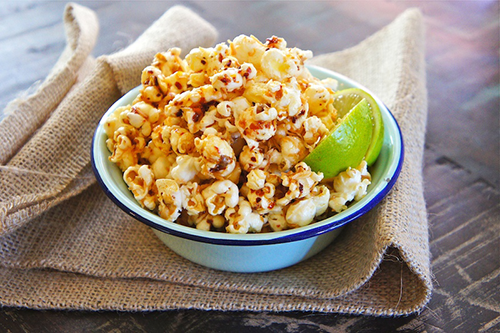
So, popcorn doesn’t have to derail our diets as the popped kernels themselves aren’t the problem, it’s those toppings (think movie-theatre butter), and spices that are the problem. For this popcorn idea, we popped in coconut oil and sprinkled with just enough chili pepper and lime juice to add an explosion of flavour. Harvard Medical School published an article in 2011 (updated in 2018), that states that coconut oils are approximately 90% saturated fat, which is higher than compared to butter at 64%. Saturated fats, in excess, raise the bad LDL cholesterol level, which increases our risk of heart disease, thus this sort of goes against our better health attempts. Coconut oils do however also contribute to the good HDL cholesterol, so this is a tricky one, but spoiling ourself, ONCE IN A WHILE, isn’t all that bad. Just don’t do it too often, and of course don’t treat this like the rest of the healthier options on this list. Avocado oil could be a healthier option, although that’s not as readily available, and cost quite a bit more, or using an air popper and adding the toppings will obviously be healthiest option for this high fibre low calorie snack, but we not many of us own air poppers.
Recipe
What we need:
- ¼ cup of popcorn kernels
- • 4 Tbsp of coconut oil (divided)
- 1 tsp of chili powder
- Juice and zest of 1 lime
- Kosher salt to taste
The method:
- Pop the popcorn as per the directions on the packaging but use 2 tablespoons of coconut oil instead.
- In a small saucepan, heat 2 tablespoons of coconut oil on medium-low heat.
- Add the chili powder, and stir well to combine.
- Add the juice of one lime leaving just a bit of juice in the lime to spritz the popcorn when served.
- Stir to combine.
- Bring to a low simmer, remove from heat, and stir.
- When the popcorn is ready, drizzle the coconut oil over the popcorn.
- Cover and toss to coat.
- Finish the popcorn off with a spritz of lime juice and sprinkle with lime zest.
Peanut butter dip
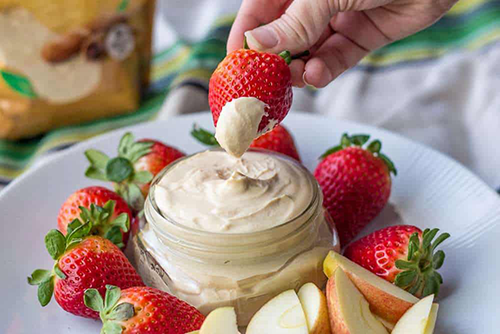
Need a little incentive to choose a fruit bowl over an ice cream bowl? This dip will definitely do the trick. It combines vanilla Greek yogurt and peanut butter, for a creamy complement to a variety of fruits such as bananas, apples, raspberries or strawberries. But you’re welcome to try any fruits you like.
Recipe
What we need:
- 250 ml Vanilla Greek Yogurt (or 1 slightly heaping cup)
- ⅓ cup creamy peanut butter
- 1 Tbsp honey (or to taste)
The method:
- Add all ingredients to a medium sized mixing bowl and whisk to blend until smooth.
- Transfer to a smaller bowl to ENJOY, or an airtight container to refrigerate and ENJOY later.
Munchies4U does not provide professional dietary advice. If you or someone you care for has special dietary requirements, medical needs or an eating disorder, please seek advice from a registered healthcare professional.